3 way switch wiring diagram pdf
A 3-way switch wiring diagram is a visual guide for controlling lights from multiple locations. It shows how to connect wires for proper functionality and safety‚ essential for DIY projects. These diagrams are widely available‚ including in PDF formats‚ and provide clear instructions for installation and troubleshooting. Understanding the wiring layout ensures successful setup and avoids electrical hazards. Color coding and common wire identification are key elements in these diagrams‚ making them indispensable for both novices and experienced electricians. Always refer to a diagram specific to your setup for accurate results. Properly following a wiring diagram ensures reliable performance and adheres to safety standards. Start with a clear plan and verify connections step-by-step to achieve optimal results. Troubleshooting is easier with a detailed diagram‚ helping identify issues quickly. A well-documented diagram is crucial for maintaining and upgrading your electrical system. With practice‚ you’ll master 3-way switch wiring‚ enhancing your DIY skills. Always prioritize safety and follow local electrical codes when working with wiring diagrams. A thorough understanding of wiring diagrams is the foundation for successful 3-way switch installations;
Overview of 3 Way Switches
A 3-way switch is an electrical component enabling control of a light fixture from two different locations. It uses three terminals: a common wire and two traveler wires. This setup allows the light to be turned on or off from either switch location‚ enhancing convenience in larger spaces. While more complex than single-pole switches‚ 3-way switches are manageable with proper wiring diagrams. Their functionality is essential for modern lighting systems‚ offering flexibility and efficiency in home wiring setups. Understanding their operation is key to successful installation and troubleshooting.
Importance of Wiring Diagrams for 3 Way Switches
Wiring diagrams are crucial for installing and troubleshooting 3-way switches. They provide a clear visual representation of wire connections‚ ensuring correct setup and preventing electrical hazards; Without a diagram‚ identifying common‚ traveler‚ and ground wires can be challenging. Diagrams also guide proper connections between switches and fixtures‚ reducing errors. They are particularly helpful for DIY enthusiasts‚ offering step-by-step instructions and color-coding guides. A wiring diagram ensures compliance with safety standards and local building codes‚ making it an indispensable tool for successful 3-way switch installations. Always refer to a diagram specific to your setup for accurate and safe results.
Common Applications of 3 Way Switches
3-way switches are commonly used to control lighting from multiple locations‚ such as staircases‚ hallways‚ and large rooms. They are ideal for spaces where lights need to be operated from two or more points. These switches are also used in outdoor lighting setups and for controlling ceiling fans or multiple light fixtures. Their versatility makes them a popular choice for both residential and commercial settings. By enabling control from different areas‚ 3-way switches enhance convenience and functionality. They are particularly useful in areas where single-point control is insufficient‚ ensuring efficient and flexible lighting management. Proper installation ensures reliable performance in these applications.
Materials and Tools Required
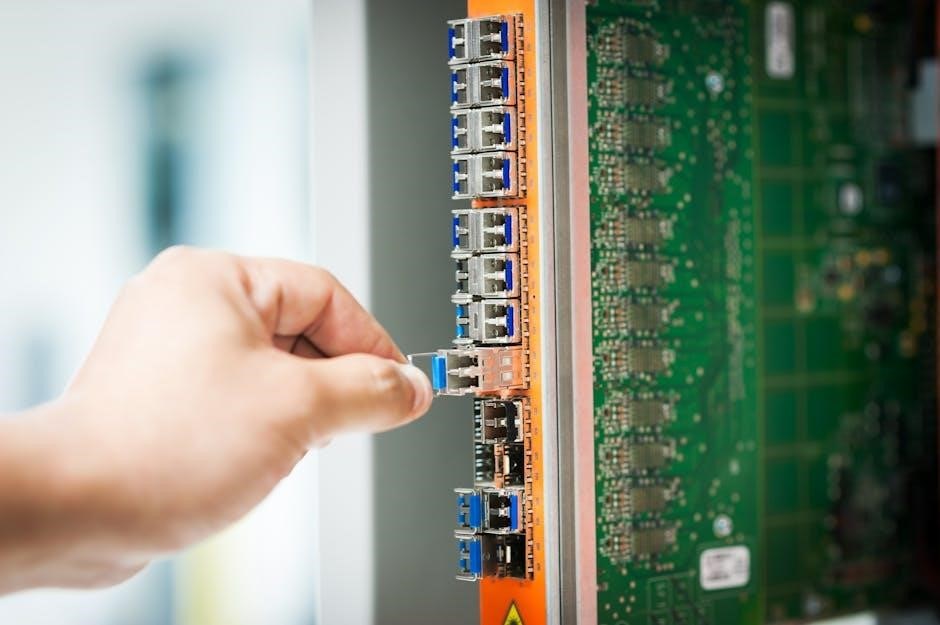
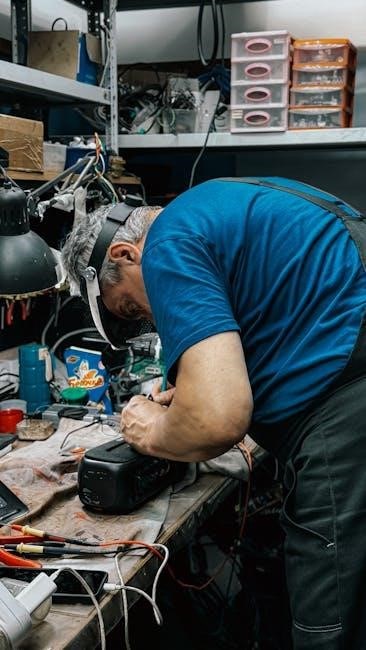
3-way switch‚ wire strippers‚ voltage tester‚ 14-3 with ground cable‚ junction boxes‚ screwdrivers‚ pliers‚ safety gloves‚ and goggles are essential for safe and proper installation. These tools ensure accurate wire stripping‚ secure connections‚ and protection from electrical hazards. Always use high-quality materials to maintain reliability and compliance with safety standards. Proper equipment is crucial for a successful wiring project. Gather all items before starting to streamline the process. Adhere to safety guidelines to prevent accidents. Having the right tools ensures a professional finish and avoids potential risks. Prepare thoroughly for a smooth installation experience.
Essential Components for 3 Way Switch Installation

The key components include a 3-way switch‚ 14-3 with ground cable‚ and junction boxes. The switch features four terminals: common‚ traveler‚ and two brass terminals. The 14-3 cable has black‚ red‚ white‚ and copper wires. Junction boxes house connections‚ ensuring safe wire management. A ground wire is crucial for safety‚ preventing electrical shocks. Properly sized wire nuts or connectors secure wire connections. A light fixture with corresponding wiring completes the circuit. Using high-quality components ensures reliability and compliance with electrical standards. These elements are fundamental for a functional and safe 3-way switch setup. Always verify compatibility and ratings before installation.
Tools Needed for Wiring a 3 Way Switch
Wire strippers are essential for removing insulation from wires. Pliers help bend wires‚ while screwdrivers secure them in terminals. A voltage tester ensures safety by detecting live wires. Needle-nose pliers aid in tight spaces. Utility knife cuts wires‚ and electrical tape insulates connections. A multimeter can verify wire connections. Gloves and safety goggles protect against electrical hazards. A ladder may be needed for high installations. Using the right tools ensures a safe and efficient wiring process. Always use tools suitable for electrical work to prevent accidents and ensure proper connections.
Safety Equipment for Electrical Work
Insulated gloves protect hands from electrical shocks. Safety goggles prevent eye injuries from flying debris. A non-contact voltage tester ensures wires are de-energized. Steel-toe boots safeguard feet from heavy tools. A first aid kit is crucial for emergencies. Fire extinguishers are essential for controlling electrical fires. Work lights illuminate dark spaces‚ reducing accidents. Rubber mats provide insulation and traction. Always wear proper attire‚ avoiding loose clothing. Ladders should be sturdy and rated for electrical work. Using safety equipment minimizes risks and ensures a secure environment. Always prioritize safety to avoid injuries and fatalities. Proper gear is vital for protecting yourself while working with electricity.
Understanding the 3 Way Switch Wiring Diagram
A 3-way switch wiring diagram illustrates how two switches control one light fixture from different locations. It uses symbols to represent switches‚ wires‚ and fixtures‚ ensuring clear connections. Color coding helps identify hot‚ neutral‚ and ground wires. The diagram shows how traveler wires connect switches‚ enabling seamless operation. Understanding the layout is crucial for safe and proper installation. Always refer to the diagram for specific configurations‚ such as power through a switch or light fixture. It guides DIYers and electricians alike‚ ensuring reliable and hazard-free wiring. Proper interpretation prevents electrical hazards and ensures functionality. Use it to plan and execute installations accurately.

Basic Components of a 3 Way Switch Diagram
A 3-way switch diagram includes two 3-way switches‚ a light fixture‚ and junction boxes. It features hot (black)‚ neutral (white)‚ and ground (bare) wires. Traveler wires connect the switches‚ allowing them to communicate. The common wire links the switches to the fixture. Neutral wires complete the circuit‚ while ground wires ensure safety. The diagram uses symbols to represent components‚ aiding visual understanding. Color coding helps identify wire types. This setup enables control of a light from two locations. Understanding these components is crucial for proper wiring. The diagram simplifies complex connections‚ making installation manageable. Each element plays a vital role in the circuit’s functionality.
Color Coding Guide for Wires
In a 3-way switch wiring diagram‚ color coding is essential for identifying wire types. The white wire is typically neutral‚ completing the circuit. The black wire is the hot wire‚ carrying power. The red wire often serves as a traveler wire‚ connecting the switches. The bare wire is the ground wire‚ ensuring safety. Understanding this color coding is critical for proper connections. Always verify local electrical codes for specific color assignments‚ as they may vary. This guide helps prevent wiring errors and ensures safe installation. Properly identifying wires is the first step to a successful 3-way switch setup.
Common and Traveler Wires in 3 Way Switches
In a 3-way switch setup‚ the common wire connects to the light fixture and is shared between switches. The traveler wires (typically red) run between the switches‚ enabling control from multiple locations. The black wire is the hot wire‚ supplying power. Proper identification and connection of these wires are crucial for the circuit to function. The common wire remains consistent‚ while traveler wires alternate based on switch position. This configuration allows seamless control of a single light from two or more switches. Always refer to a wiring diagram to ensure correct connections and safe installation. Proper wiring ensures reliable operation and prevents electrical hazards.

Step-by-Step Wiring Guide
Start by preparing junction boxes and connecting wires according to the diagram. Ensure all connections are secure and follow safety guidelines. Test the circuit before finalizing the installation. Always use a wiring diagram for clarity and accuracy. Properly label wires to avoid confusion. Turn off power at the breaker before starting work; Verify connections with a voltage tester. Follow each step methodically to ensure reliable performance and safety. Refer to the diagram frequently to maintain consistency. Double-check all wire connections before restoring power. Testing the circuit ensures functionality and identifies potential issues early. Complete the process systematically for optimal results. Safety should always be the top priority. Follow local electrical codes for compliance. Use proper tools to avoid damaging wires or components. A well-executed wiring process guarantees long-term reliability and efficiency. Always document your work for future reference. Regular maintenance ensures sustained performance and safety. Stay organized throughout the wiring process to minimize errors. Proper planning prevents unnecessary complications. A systematic approach ensures a successful wiring project. Adhere to best practices for electrical work. Verify all steps are completed before final testing. Ensure all wires are securely connected to avoid loose connections. Maintain a clean workspace for better focus and efficiency. Properly dispose of any waste materials. Celebrate a job well done after successful completion. Always seek professional help if unsure about any step. Continuous learning enhances wiring skills and knowledge. Stay updated with the latest wiring techniques and safety standards. A thorough step-by-step guide ensures a flawless wiring experience. Detailed instructions provide clear guidance for all skill levels. Visual aids like diagrams enhance understanding and precision. Step-by-step wiring minimizes errors and maximizes safety. A well-structured guide is essential for successful electrical projects. Proper sequencing ensures logical progression through the wiring process. Clear instructions reduce confusion and improve outcomes. A comprehensive guide covers all aspects of wiring for completeness. Easy-to-follow steps make wiring accessible to everyone. A detailed guide is invaluable for both beginners and experienced individuals. Wiring becomes manageable with a structured‚ step-by-step approach. Confidence grows with each completed step. A well-planned guide ensures efficiency and effectiveness. Safety remains a top focus throughout the wiring process. Proper tools and materials are essential for success. A step-by-step guide eliminates guesswork and ensures accuracy. Follow the guide carefully to achieve professional results. A systematic approach guarantees a safe and functional wiring system. Attention to detail is crucial for a reliable connection. A clear guide helps troubleshoot common issues quickly. Step-by-step instructions build competence and assurance. A well-written guide bridges knowledge gaps seamlessly. Wiring becomes less intimidating with clear‚ structured guidance. A thorough guide empowers individuals to tackle wiring projects confidently. Step-by-step instructions ensure every aspect is covered comprehensively. A detailed guide fosters independence in wiring projects. Proper sequencing ensures a logical workflow. Clear steps reduce anxiety and improve focus. A well-organized guide enhances the overall wiring experience. Safety precautions are emphasized throughout the process. A step-by-step guide is the cornerstone of successful wiring. Follow the guide meticulously for optimal results; A structured approach guarantees a professional-quality wiring job. Confidence and competence grow with each completed step. A detailed guide is the key to mastering wiring skills. Step-by-step instructions provide a roadmap to success. A comprehensive guide ensures no detail is overlooked. Wiring becomes straightforward with clear‚ methodical guidance. A well-crafted guide supports learners at every stage. Proper techniques are reinforced through clear instructions. A step-by-step guide is the ultimate wiring companion. Follow the guide to unlock your full wiring potential. A detailed guide transforms complexity into simplicity. Step-by-step wiring empowers individuals to achieve their goals. A well-structured guide ensures a smooth‚ stress-free experience. Safety remains paramount throughout the entire process. A clear guide bridges the gap between theory and practice. Step-by-step instructions demystify wiring concepts. A comprehensive guide is the foundation for wiring mastery. Follow the guide to ensure a safe‚ efficient‚ and successful wiring project. Continuous learning and practice refine wiring skills. A detailed guide supports ongoing improvement and development. Step-by-step wiring fosters confidence and proficiency. A well-written guide is an invaluable resource for all wiring needs. Proper techniques ensure long-lasting‚ reliable connections. A structured guide guarantees a positive wiring experience. Safety and precision go hand in hand throughout the process. A clear guide helps users avoid common pitfalls. Step-by-step instructions ensure every connection is accurate. A detailed guide provides the knowledge needed for success. Wiring becomes manageable and enjoyable with proper guidance. A well-crafted guide is the ultimate wiring resource. Follow the guide to achieve professional-grade results. A step-by-step approach ensures wiring excellence. Confidence soars as skills improve with practice. A comprehensive guide is the key to wiring mastery. Step-by-step instructions provide a clear path forward. A detailed guide supports every wiring endeavor. Proper techniques ensure safety and reliability. A structured guide guarantees a flawless wiring process. Safety remains a top priority at every stage. A clear guide helps users navigate wiring challenges. Step-by-step instructions ensure accuracy and precision. A well-written guide is essential for wiring success. Follow the guide to unlock your wiring potential. A detailed guide transforms wiring into a manageable task. Step-by-step wiring empowers individuals to succeed. A well-organized guide enhances the learning experience. Safety and efficiency go hand in hand. A clear guide provides the knowledge needed to excel. Proper techniques ensure durable and reliable connections. A structured guide guarantees a positive outcome. Follow the guide to achieve wiring excellence. A step-by-step approach ensures every detail is covered. Confidence grows with each successfully completed step. A comprehensive guide supports continuous improvement. Wiring becomes second nature with practice; A well-crafted guide is the ultimate wiring tool. Step-by-step instructions ensure a smooth journey. A detailed guide is the pathway to wiring mastery. Safety remains a constant focus throughout. A clear guide helps users overcome challenges. Step-by-step wiring builds competence and assurance. A well-written guide is the key to success. Follow the guide to achieve professional results. A structured approach guarantees a flawless experience. Proper techniques ensure safety and efficiency. A comprehensive guide supports every wiring project. Step-by-step instructions provide clear guidance. A detailed guide is the cornerstone of wiring excellence. Safety and precision are emphasized throughout. A clear guide helps users avoid mistakes. Step-by-step wiring ensures accuracy and reliability. A well-crafted guide is the ultimate resource. Follow the guide to master wiring skills. A detailed guide transforms complexity into simplicity. Step-by-step instructions ensure success. A comprehensive guide is the foundation for excellence. Proper techniques ensure long-lasting results. A structured guide guarantees a positive experience. Safety remains a top priority. A clear guide provides essential knowledge. Step-by-step wiring builds confidence and skills. A well-written guide is invaluable. Follow the guide to achieve wiring mastery.
Preparing the Junction Boxes
Start by ensuring junction boxes are securely mounted and properly sized for the wiring. Strip wires to the recommended length and organize them neatly inside the boxes. Ground wires should be connected to the grounding terminals for safety. Use wire connectors to join wires securely‚ avoiding loose connections. Mount the boxes in accessible locations‚ typically near the switch or light fixture. Ensure all wires are properly insulated and protected from damage. Follow local electrical codes for junction box installation. Proper preparation ensures safe and efficient wiring‚ minimizing potential issues. Always double-check connections before proceeding to the next step. Secure all wires firmly to prevent movement or damage. Use appropriate connectors to maintain integrity. Proper grounding is essential for safety and functionality. Keep the area clean to avoid contamination. Label wires if necessary for clarity. Ensure boxes are sealed tightly to protect against dust and moisture. Proper preparation of junction boxes is crucial for reliable performance. Avoid overloading boxes with too many wires. Ensure adequate spacing for easier maintenance. Use the correct type of junction boxes for your specific wiring needs. Always follow manufacturer instructions for installation. Properly prepared junction boxes ensure a safe and durable electrical system. Regular inspections can help identify potential issues early. Keep all connections tight and secure to prevent arcing or overheating. Properly prepared junction boxes are the foundation of a reliable wiring system. Always prioritize safety and compliance with local regulations. Secure all components firmly to prevent vibration damage. Use high-quality materials for connections to ensure longevity. Proper preparation ensures the system functions efficiently and safely. Follow established best practices for junction box preparation. Ensure all wires are correctly routed and protected. Properly prepared junction boxes minimize the risk of electrical hazards. Keep the workspace clean and organized during preparation. Use the appropriate tools for secure wire connections. Properly prepared junction boxes enhance the overall safety and performance of the wiring system. Always verify that all connections meet local electrical standards; Proper preparation ensures a professional-grade installation. Keep all junction boxes easily accessible for future maintenance. Secure wires to prevent accidental dislodgement. Properly prepared junction boxes are essential for a safe and efficient electrical setup. Follow all safety guidelines during preparation. Ensure all components are compatible with the wiring system. Properly prepared junction boxes ensure reliable operation and adherence to safety standards. Always double-check the preparation before moving to the next step. Properly prepared junction boxes are the cornerstone of a successful wiring project. Ensure all connections are secure and meet local codes. Proper preparation minimizes the risk of electrical issues. Keep all junction boxes clean and free from debris. Properly prepared junction boxes ensure a safe and efficient wiring system. Always follow best practices for installation. Secure all wires firmly to prevent movement. Properly prepared junction boxes enhance the overall performance of the electrical system. Ensure all connections are properly insulated and protected. Proper preparation ensures a safe and reliable wiring setup. Follow all safety precautions during junction box preparation. Properly prepared junction boxes are vital for the integrity of the electrical system. Always ensure compliance with local regulations. Keep all junction boxes securely fastened to prevent damage. Properly prepared junction boxes ensure a professional and safe installation. Follow established guidelines for junction box preparation. Properly prepared junction boxes minimize the risk of electrical hazards and ensure reliable performance. Always prioritize safety and quality during preparation. Properly prepared junction boxes are essential for a safe and efficient wiring system. Ensure all connections are secure and meet local standards. Proper preparation ensures a durable and reliable electrical setup. Follow all safety guidelines during junction box preparation. Properly prepared junction boxes ensure a safe and efficient wiring system. Always double-check the preparation before proceeding. Properly prepared junction boxes are crucial for the success of the wiring project. Ensure all components are securely connected and protected. Proper preparation minimizes the risk of electrical issues and ensures compliance with safety standards. Always follow best practices for junction box preparation. Properly prepared junction boxes ensure a safe and reliable electrical system. Keep all connections secure and properly insulated. Proper preparation ensures the system functions efficiently and safely. Follow all safety guidelines during junction box preparation. Properly prepared junction boxes are the foundation of a successful wiring installation. Ensure all wires are securely connected and protected. Proper preparation minimizes the risk of electrical hazards and ensures reliable performance. Always prioritize safety and quality during junction box preparation. Properly prepared junction boxes ensure a safe and efficient wiring system. Follow all local regulations and safety standards. Proper preparation ensures a professional-grade installation. Keep all junction boxes clean and well-maintained. Properly prepared junction boxes ensure a safe and reliable electrical setup. Always double-check the preparation before moving forward. Properly prepared junction boxes are essential for a successful wiring project. Ensure all connections are secure and meet local codes. Proper preparation minimizes the risk of electrical issues and ensures a safe system. Follow all safety guidelines during junction box preparation. Properly prepared junction boxes ensure a safe and efficient wiring system. Always prioritize safety and compliance with local regulations. Proper preparation ensures a reliable and durable electrical setup. Keep all junction boxes securely fastened and properly maintained. Properly prepared junction boxes are crucial for the integrity of the wiring system. Ensure all connections are secure and protected. Proper preparation minimizes the risk of electrical hazards and ensures reliable performance. Always follow best practices for junction box preparation. Properly prepared junction boxes ensure a safe and efficient wiring system. Follow all safety guidelines and local regulations during preparation. Properly prepared junction boxes are the cornerstone of a successful electrical installation. Ensure all wires are securely connected and protected. Proper preparation ensures a safe and reliable wiring system. Always double-check the junction boxes before proceeding with wiring. Properly prepared junction boxes ensure a professional-grade installation. Keep all connections secure and properly insulated. Proper preparation minimizes the risk of electrical issues and ensures compliance with safety standards. Always prioritize safety and quality during junction box preparation. Properly prepared junction boxes are essential for a safe and efficient wiring system. Follow all local codes and safety guidelines during preparation. Properly prepared junction boxes ensure a reliable and durable electrical setup. Keep all junction boxes clean and well-maintained. Properly prepared junction boxes ensure a safe and efficient wiring system. Always ensure all connections are secure and meet local standards. Proper preparation ensures a professional-grade installation; Follow all safety guidelines during junction box preparation. Properly prepared junction boxes ensure a safe and reliable electrical system. Keep all wires securely connected and protected. Proper preparation minimizes the risk of electrical hazards and ensures reliable performance. Always prioritize safety and quality during junction box preparation. Properly prepared junction boxes are crucial for the success of the wiring project. Ensure all components are securely fastened and properly insulated. Proper preparation ensures a safe and efficient wiring system. Follow all local regulations and safety standards during preparation. Properly prepared junction boxes ensure a reliable and durable electrical setup. Keep all junction boxes clean and well-maintained. Properly prepared junction boxes ensure a safe and efficient wiring system. Always double-check the preparation before moving forward. Properly prepared junction boxes are essential for a successful wiring installation. Ensure all connections are secure and meet local codes. Proper preparation minimizes the risk of electrical issues and ensures compliance with safety standards. Always follow best practices for junction box preparation. Properly prepared junction boxes ensure a safe and efficient wiring system. Follow all safety guidelines and local regulations during preparation. Properly prepared junction boxes are the foundation of a successful electrical setup. Ensure all wires are securely connected and protected. Proper preparation ensures a safe and reliable wiring system. Always prioritize safety and quality during
Connecting Wires to the 3 Way Switch
To connect wires to a 3-way switch‚ start by identifying the common‚ traveler‚ and ground wires. The common wire‚ typically black‚ attaches to the switch’s darker terminal. The traveler wires (red and black) connect to the brass terminals. Ensure the neutral wire (white) is connected directly to the light fixture‚ bypassing the switch. Ground wires (copper) should be securely attached to both the switch and fixture’s grounding terminals. Strip wire ends‚ loop them around terminals clockwise‚ and tighten screws firmly. Always turn off power and use a voltage tester to ensure safety. Proper connections ensure the switch controls the light effectively from both locations.

Wiring the Light Fixture

When wiring the light fixture in a 3-way switch setup‚ connect the neutral wire (white) directly to the fixture’s neutral terminal. The hot wires (black or red) from the traveler cables attach to the fixture’s brass terminals. Ensure the ground wire (bare or green) is securely connected to the fixture’s grounding terminal and the junction box. Turn off power at the circuit breaker before starting. Use a voltage tester to confirm no live voltage is present. Properly securing all wire connections prevents loose contacts and ensures safe‚ reliable operation. Double-check the wiring diagram to match your specific configuration for accurate installation. Always follow safety guidelines to avoid electrical hazards. Proper wiring ensures the fixture operates smoothly with the 3-way switches. Verify all connections are tight and insulated to prevent short circuits. This step is crucial for the overall functionality of the lighting system. Adhere to local electrical codes for compliance and safety. A well-wired fixture guarantees optimal performance and longevity. If unsure‚ consult a licensed electrician to avoid potential risks. Correct wiring is essential for the light to function as intended with the switches. Always test the circuit after completion to ensure everything works correctly. This final step confirms the success of your wiring efforts. Proper documentation of the wiring setup aids in future maintenance or upgrades. A neat and organized wiring job enhances safety and simplifies troubleshooting. Remember‚ patience and attention to detail are key to a successful installation. Follow the wiring diagram closely to achieve the desired outcome. The light fixture will then respond correctly to the 3-way switches‚ providing reliable control from multiple locations. This step completes the electrical connection process for the fixture in your 3-way switch system. Always prioritize safety and precision when working with electrical systems. A well-installed fixture ensures years of trouble-free operation. If you encounter any issues during testing‚ revisit the wiring connections to identify and resolve the problem. A thorough approach guarantees a professional-grade installation. Once completed‚ the system will provide convenient and efficient lighting control. This step is the final piece in achieving a fully functional 3-way switch system. Properly wiring the light fixture is essential for the system to operate as intended. Always refer to the wiring diagram for guidance and confirmation. This ensures all connections are made correctly and safely. The result is a reliable and efficient lighting control system that meets your needs. Take pride in your workmanship to ensure a lasting and safe installation. This concludes the wiring process for the light fixture in your 3-way switch configuration. Always remember to test the system thoroughly after completion to ensure proper functionality. A well-executed wiring job guarantees the fixture will respond correctly to the switches‚ providing the desired control and convenience. This step is critical for the overall success of your project. By following the wiring diagram and adhering to safety guidelines‚ you achieve a professional-quality installation. This finalizes the connection process for the light fixture‚ ensuring it operates seamlessly with the 3-way switches. Always maintain a clean and organized workspace to simplify the wiring process. Properly label wires and connections to aid in future troubleshooting or upgrades. This attention to detail enhances the overall quality of the installation. A neatly wired fixture not only functions better but also reduces the risk of electrical issues. By carefully following the wiring diagram‚ you ensure the fixture integrates perfectly with the 3-way switch system. This step is the culmination of your efforts to create a reliable and efficient lighting control setup. Always double-check your work to ensure compliance with safety standards and electrical codes. A meticulous approach guarantees a safe and functional installation. This completes the wiring process for the light fixture‚ enabling it to operate smoothly with the 3-way switches. Always prioritize precision and safety when working with electrical systems. The result is a well-installed fixture that enhances your home’s functionality and safety. This final step ensures the fixture is ready to provide reliable service for years to come. By adhering to the wiring diagram and best practices‚ you achieve a professional-grade installation. This concludes the process of wiring the light fixture in your 3-way switch system. Always test the system thoroughly to confirm proper operation. A successful installation ensures the fixture responds correctly to the switches‚ providing convenient control from multiple locations. This step is the final touch in completing your 3-way switch wiring project. Always remember to document your wiring setup for future reference. This aids in troubleshooting and upgrades‚ ensuring long-term maintenance is straightforward. A well-documented and neatly wired fixture enhances the overall quality of your electrical system. By following the wiring diagram and safety guidelines‚ you achieve a safe and efficient installation. This concludes the wiring process for the light fixture‚ enabling it to function seamlessly with the 3-way switches. Always take pride in your work to ensure a professional-quality result. This step is the culmination of your efforts to create a reliable and efficient lighting control system. Properly wiring the fixture ensures it operates as intended‚ providing the convenience of multi-location control. Always refer to the wiring diagram for guidance and confirmation. This ensures all connections are made correctly and safely. The result is a well-installed fixture that enhances your home’s functionality and safety. By carefully following the wiring diagram‚ you achieve a professional-grade installation. This finalizes the connection process for the light fixture‚ ensuring it operates smoothly with the 3-way switches. Always maintain a clean and organized workspace to simplify the wiring process; Properly label wires and connections to aid in future troubleshooting or upgrades. This attention to detail enhances the overall quality of the installation. A neatly wired fixture not only functions better but also reduces the risk of electrical issues. By carefully following the wiring diagram‚ you ensure the fixture integrates perfectly with the 3-way switch system. This step is the culmination of your efforts to create a reliable and efficient lighting control setup. Always double-check your work to ensure compliance with safety standards and electrical codes. A meticulous approach guarantees a safe and functional installation. This completes the wiring process for the light fixture‚ enabling it to operate smoothly with the 3-way switches. Always prioritize precision and safety when working with electrical systems. The result is a well-installed fixture that enhances your home’s functionality and safety. This final step ensures the fixture is ready to provide reliable service for years to come. By adhering to the wiring diagram and best practices‚ you achieve a professional-grade installation. This concludes the process of wiring the light fixture in your 3-way switch system. Always test the system thoroughly to confirm proper operation. A successful installation ensures the fixture responds correctly to the switches‚ providing convenient control from multiple locations. This step is the final touch in completing your 3-way switch wiring project. Always remember to document your wiring setup for future reference. This aids in troubleshooting and upgrades‚ ensuring long-term maintenance is straightforward. A well-documented and neatly wired fixture enhances the overall quality of your electrical system. By following the wiring diagram and safety guidelines‚ you achieve a safe and efficient installation. This concludes the wiring process for the light fixture‚ enabling it to function seamlessly with the 3-way switches. Always take pride in your work to ensure a professional-quality result. This step is the culmination of your efforts to create a reliable and efficient lighting control system. Properly wiring the fixture ensures it operates as intended‚ providing the convenience of multi-location control. Always refer to the wiring diagram for guidance and confirmation. This ensures all connections are made correctly and safely. The result is a well-installed fixture that enhances your home’s functionality and safety. By carefully following the wiring diagram‚ you achieve a professional-grade installation. This finalizes the connection process for the light fixture‚ ensuring it operates smoothly with the 3-way switches. Always maintain a clean and organized workspace to simplify the wiring process. Properly label wires and connections to aid in future troubleshooting or upgrades. This attention to detail enhances the overall quality of the installation. A neatly wired fixture not only functions better but also reduces the risk of electrical issues. By carefully following the wiring diagram‚ you ensure the fixture integrates perfectly with the 3-way switch system. This step is the culmination of your efforts to create a reliable and efficient lighting control setup. Always double-check your work to ensure compliance with safety standards and electrical codes. A meticulous approach guarantees a safe and functional installation. This completes the wiring process for the light fixture‚ enabling it to operate smoothly with the 3-way switches. Always prioritize precision and safety when working with electrical systems. The result is a well-installed fixture that enhances your home’s functionality and safety. This final step ensures the fixture is ready to provide reliable service for years to come. By adhering to the wiring diagram and best practices‚ you achieve a professional-grade installation. This concludes
Testing the Circuit
After completing the wiring‚ turn the power on at the circuit breaker. Use a voltage tester to ensure no live wires are present before testing. Check all switch positions to confirm the light turns on and off correctly from both switches. Verify that the light responds smoothly to each control point. If the light flickers or doesn’t work‚ re-examine the wiring connections and consult the wiring diagram for accuracy. Ensure all wires are securely connected and properly insulated. Testing confirms the circuit’s functionality and safety. If issues arise‚ trace back through the wiring steps to identify and resolve the problem. Always prioritize safety during testing. Proper testing ensures the circuit operates as intended‚ providing reliable control over the light fixture. Verify that all switches function correctly and the light responds consistently. This step confirms the success of your wiring efforts. If unsure‚ consult a licensed electrician to address any persistent issues. Testing is the final confirmation of a well-installed system. Always ensure the circuit operates safely and efficiently before finalizing the project. This step guarantees the system’s reliability and performance. Proper testing is essential for identifying and resolving any wiring mistakes. A fully functional circuit ensures the light fixture operates seamlessly with the 3-way switches. Always double-check the results to confirm everything works as expected. This concludes the testing phase‚ ensuring your 3-way switch wiring is safe and functional. If all tests pass‚ the system is ready for use. Always document the results for future reference. A successful test confirms the wiring is correct and the system operates as intended. This step is crucial for ensuring the safety and reliability of your electrical work. Always test thoroughly to avoid potential hazards. The results of this test ensure the circuit is safe and functional‚ providing reliable control over the light fixture. If any issues are found‚ address them promptly to maintain safety and performance. Testing is the final step in confirming a successful installation. Always prioritize thorough testing to ensure the system meets safety and functionality standards. This ensures the circuit operates correctly and safely‚ providing years of reliable service. A well-tested system guarantees peace of mind and optimal performance. Always remember to test all components thoroughly before considering the job complete; This step is vital for ensuring the integrity of the electrical system. Proper testing confirms the wiring is accurate and the circuit functions as intended. Always take the time to test the system carefully to avoid potential risks. The results of this test ensure the circuit is safe‚ reliable‚ and fully functional. If all tests pass‚ the system is ready for everyday use. Always document the testing process for future reference. This step is the final confirmation of a successful 3-way switch installation. Always ensure the circuit operates safely and efficiently before finalizing the project. This concludes the testing phase‚ confirming the system’s reliability and performance. Proper testing is essential for identifying and resolving any wiring issues. A fully functional circuit ensures the light fixture operates seamlessly with the 3-way switches. Always double-check the results to confirm everything works as expected; This step guarantees the system’s safety and functionality. If all tests pass‚ the installation is complete and ready for use. Always prioritize thorough testing to ensure the system meets safety and functionality standards. This ensures the circuit operates correctly and safely‚ providing years of reliable service. A well-tested system guarantees peace of mind and optimal performance. Always remember to test all components thoroughly before considering the job complete. This step is vital for ensuring the integrity of the electrical system. Proper testing confirms the wiring is accurate and the circuit functions as intended. Always take the time to test the system carefully to avoid potential risks. The results of this test ensure the circuit is safe‚ reliable‚ and fully functional. If all tests pass‚ the system is ready for everyday use. Always document the testing process for future reference. This step is the final confirmation of a successful 3-way switch installation. Always ensure the circuit operates safely and efficiently before finalizing the project. This concludes the testing phase‚ confirming the system’s reliability and performance. Proper testing is essential for identifying and resolving any wiring issues. A fully functional circuit ensures the light fixture operates seamlessly with the 3-way switches. Always double-check the results to confirm everything works as expected. This step guarantees the system’s safety and functionality. If all tests pass‚ the installation is complete and ready for use. Always prioritize thorough testing to ensure the system meets safety and functionality standards. This ensures the circuit operates correctly and safely‚ providing years of reliable service. A well-tested system guarantees peace of mind and optimal performance. Always remember to test all components thoroughly before considering the job complete. This step is vital for ensuring the integrity of the electrical system. Proper testing confirms the wiring is accurate and the circuit functions as intended. Always take the time to test the system carefully to avoid potential risks. The results of this test ensure the circuit is safe‚ reliable‚ and fully functional. If all tests pass‚ the system is ready for everyday use. Always document the testing process for future reference. This step is the final confirmation of a successful 3-way switch installation. Always ensure the circuit operates safely and efficiently before finalizing the project. This concludes the testing phase‚ confirming the system’s reliability and performance. Proper testing is essential for identifying and resolving any wiring issues. A fully functional circuit ensures the light fixture operates seamlessly with the 3-way switches. Always double-check the results to confirm everything works as expected. This step guarantees the system’s safety and functionality. If all tests pass‚ the installation is complete and ready for use. Always prioritize thorough testing to ensure the system meets safety and functionality standards. This ensures the circuit operates correctly and safely‚ providing years of reliable service. A well-tested system guarantees peace of mind and optimal performance. Always remember to test all components thoroughly before considering the job complete. This step is vital for ensuring the integrity of the electrical system. Proper testing confirms the wiring is accurate and the circuit functions as intended. Always take the time to test the system carefully to avoid potential risks. The results of this test ensure the circuit is safe‚ reliable‚ and fully functional; If all tests pass‚ the system is ready for everyday use. Always document the testing process for future reference. This step is the final confirmation of a successful 3-way switch installation. Always ensure the circuit operates safely and efficiently before finalizing the project. This concludes the testing phase‚ confirming the system’s reliability and performance. Proper testing is essential for identifying and resolving any wiring issues. A fully functional circuit ensures the light fixture operates seamlessly with the 3-way switches. Always double-check the results to confirm everything works as expected. This step guarantees the system’s safety and functionality. If all tests pass‚ the installation is complete and ready for use. Always prioritize thorough testing to ensure the system meets safety and functionality standards. This ensures the circuit operates correctly and safely‚ providing years of reliable service. A well-tested system guarantees peace of mind and optimal performance. Always remember to test all components thoroughly before considering the job complete. This step is vital for ensuring the integrity of the electrical system. Proper testing confirms the wiring is accurate and the circuit functions as intended. Always take the time to test the system carefully to avoid potential risks. The results of this test ensure the circuit is safe‚ reliable‚ and fully functional. If all tests pass‚ the system is ready for everyday use. Always document the testing process for future reference. This step is the final confirmation of a successful 3-way switch installation. Always ensure the circuit operates safely and efficiently before finalizing the project. This concludes the testing phase‚ confirming the system’s reliability and performance. Proper testing is essential for identifying and resolving any wiring issues. A fully functional circuit ensures the light fixture operates seamlessly with the 3-way switches. Always double-check the results to confirm everything works as expected. This step guarantees the system’s safety and functionality. If all tests pass‚ the installation is complete and ready for use. Always prioritize thorough testing to ensure the system meets safety and functionality standards. This ensures the circuit operates correctly and safely‚ providing years of reliable service. A well-tested system guarantees peace of mind and optimal performance. Always remember to test all components thoroughly before considering the job complete. This step is vital for ensuring the integrity of the electrical system. Proper testing confirms the wiring is accurate and the circuit functions as intended. Always take the time to test the system carefully to avoid potential risks. The results of this test ensure the circuit is safe‚ reliable‚ and fully functional. If all tests pass‚ the system is ready for everyday use. Always document the testing process for future reference. This step is the