
johnson pocket door instructions
Johnson Pocket Door Instructions: A Comprehensive Guide
Navigating the world of pocket doors requires understanding various hardware options and installation techniques. This guide details Johnson systems,
from initial space assessment to final adjustments, ensuring a smooth and durable operation for years to come.
Understanding Johnson Pocket Door Systems
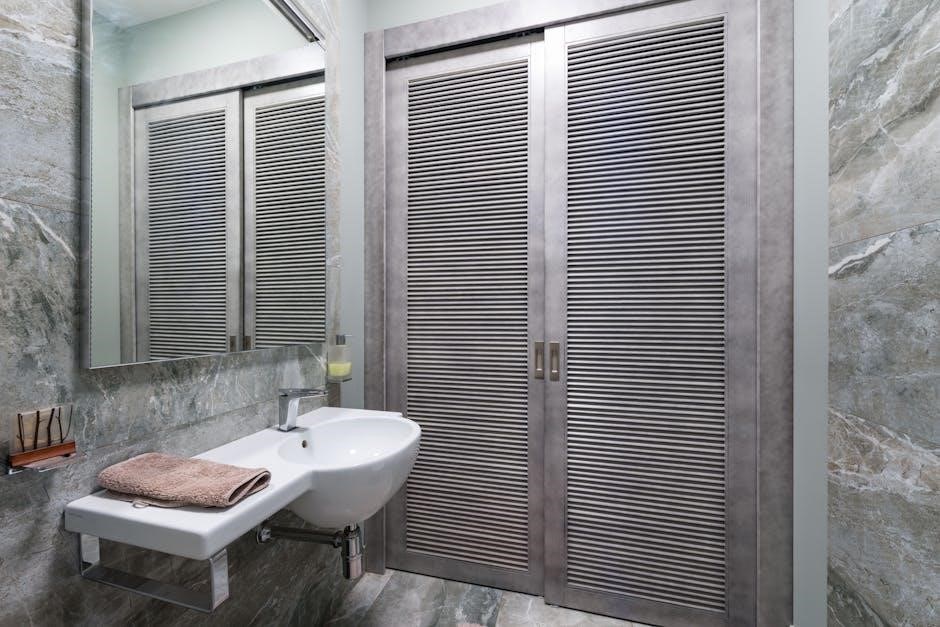
Johnson pocket door systems represent a sophisticated solution for space-saving doorways, differing significantly from traditional swinging doors. These systems conceal the door within the wall cavity when open, maximizing usable floor space – a crucial benefit in smaller homes or areas demanding efficient layouts. The core of a Johnson system lies in its robust hardware, including a track, rollers, and guides, all engineered for smooth and reliable operation.
Johnson offers a range of systems catering to diverse weight capacities and installation scenarios; Understanding these variations is key to selecting the appropriate hardware for your specific door slab. From standard-duty kits suitable for lightweight doors to heavy-duty options capable of supporting solid-core doors exceeding 200lbs, Johnson provides solutions for nearly any application. Furthermore, their systems incorporate features like soft-close mechanisms and hidden guides, enhancing both functionality and aesthetics. Proper installation, adhering to manufacturer guidelines, is paramount to ensure longevity and prevent operational issues like binding or sticking.
Types of Johnson Pocket Door Hardware
Johnson Hardware offers a diverse catalog of components for pocket door installations, categorized by function and application. Key elements include the pocket door frame itself, available in pre-packaged kits up to 96 inches, or individually up to 192 inches, allowing customization for various doorway widths. The track system, crucial for smooth gliding, comes in standard and ball-bearing roller options, the latter providing superior performance, especially with heavier doors.
Door guides are also varied, ranging from traditional compression-style plastic guides to Johnson’s innovative hidden guides, which offer a cleaner aesthetic and prevent visible wear. Additional hardware includes track stops, door stops, and hinges for folding door variations. For enhanced functionality, soft-close mechanisms are available, minimizing noise and preventing slamming. Universal replacement parts cater to repairs and upgrades, while specialized components like plywood clips reinforce the frame for added stability and screw-holding power, particularly beneficial when installing heavier solid-core doors.
Johnson 1500 Series: Overview and Features
The Johnson 1500 Series represents a popular and versatile choice for residential pocket door applications. This series is known for its reliable performance and relatively straightforward installation process, making it suitable for both DIY enthusiasts and professional contractors. A key feature is its capacity to accommodate standard door slabs, though utilizing solid-core doors with this series is highly recommended for improved sound insulation and durability.
The 1500SC model incorporates a soft-close mechanism, adding a touch of luxury and preventing noisy door closures. Hardware sets typically include the track, header, and necessary guides, though purchasing additional reinforcement like plywood clips is advisable, especially for heavier doors or high-traffic areas. Installation instructions from Buildipedia detail the process, emphasizing the importance of proper header securing and track alignment. Users often report successful installations with careful attention to the 3/4″ floor finish allowance factored into the calculations.
Pre-Installation: Assessing Your Space
Before embarking on a Johnson pocket door installation, a thorough space assessment is crucial for a successful outcome. Begin by carefully evaluating the wall cavity where the door will reside, ensuring it’s sufficiently clear of obstructions like electrical wiring, plumbing, or HVAC ductwork. Confirm adequate depth is available to accommodate the door slab when fully retracted into the pocket. Consider the existing wall construction; reinforcing the framing with plywood clips, as suggested by experienced installers, can significantly enhance stability, particularly with heavier solid-core doors.
Next, assess the floor surface and anticipate any planned flooring additions. Remember to account for the standard 3/4″ allowance for floor finish when calculating clearances, preventing future binding issues. Finally, verify the wall is structurally sound enough to support the weight of the door and hardware, especially when opting for heavy-duty 200lb rated frame kits.

Measuring for a Johnson Pocket Door
Accurate measurements are paramount for a seamless Johnson pocket door installation. Start by determining the desired door width, and then calculate the required track length. Johnson hardware offers pre-packaged sets up to 96″ (2438mm) for standard applications, but individual components are available for lengths up to 192″ (4877mm). Ensure the track extends at least 6″ beyond the door opening on both sides to allow for proper door travel and prevent interference.
Crucially, measure the height of the opening, factoring in the door slab’s thickness and any planned floor finish. Remember the 3/4″ allowance for flooring! Double-check all measurements before ordering hardware to avoid costly errors and ensure a perfect fit. Precise measurements guarantee smooth operation and prevent future adjustments.
Calculating Track Length
Determining the correct track length is vital for optimal pocket door function. Begin by measuring the width of the door slab itself. Then, add a minimum of 6 inches to this measurement – 3 inches on each side – to account for the door needing to fully recess into the wall cavity. This ensures the door doesn’t bind or obstruct the opening during operation.
For example, a 30-inch door requires a minimum 36-inch track. Consider adding extra length for wider doorways or if you anticipate needing additional clearance; Johnson hardware is available in various lengths, so choose a size that comfortably accommodates your measurements. Always err on the side of slightly longer rather than too short, as a track can be trimmed, but not extended.
Tools Required for Installation
Successful Johnson pocket door installation demands a specific toolkit. Essential items include a stud finder to accurately locate wall studs for secure mounting. A level is crucial for ensuring the track is perfectly horizontal, preventing door binding. You’ll need a measuring tape for precise measurements, a pencil for marking cut lines, and safety glasses to protect your eyes.
Power tools like a drill and screwdriver (or drill with screwdriver bits) are necessary for attaching hardware. A circular saw or hand saw will be needed for trimming the track or door if required. Additionally, a utility knife is helpful for scoring drywall. Don’t forget a hammer, shims for leveling, and potentially a router for creating door bottom slots for hidden guides.
Preparing the Wall Opening
Before installing the Johnson pocket door frame, meticulous wall preparation is key. Carefully remove drywall to create an opening slightly wider than the door slab, accommodating the frame’s dimensions. Ensure the opening is square; any irregularities will impact door operation. Inspect the studs within the opening – they must be plumb and structurally sound to support the hardware.
Reinforce any weak studs with additional lumber if necessary, ensuring they can bear the weight of the door and frame. Clear the area of any obstructions like wiring or plumbing, relocating them if needed. Double-check all measurements against the chosen hardware kit’s specifications. A properly prepared opening guarantees a smooth installation and long-lasting performance.
Installing the Pocket Door Frame
Begin by assembling the Johnson pocket door frame components according to the manufacturer’s instructions. Carefully position the assembled frame within the prepared wall opening, ensuring it’s level and plumb. Use shims to achieve perfect alignment, as this is crucial for smooth door operation. Secure the frame to the existing wall studs using appropriate screws – ensuring they penetrate sufficiently into the studs for a robust hold.

Pay close attention to securing the header, as it bears the majority of the weight. Confirm the header is firmly attached and can support the door’s load. Adding plywood clips between the metal studs, as recommended, significantly reinforces the wall cavity, providing a solid base for screw attachment.
Securing the Header
The header is the critical structural component of the pocket door frame, bearing the entire weight of the door and hardware. Ensure it’s securely fastened to the surrounding wall studs using appropriate screws – typically, longer screws are needed for optimal support. Verify the header is perfectly level; even a slight deviation can cause operational issues later on.
Consider adding reinforcement to the header, especially for heavier solid-core doors. Utilizing Johnson plywood clips between the metal studs provides substantial support, creating a robust surface for screw attachment. This reinforcement is particularly beneficial when installing a toilet paper holder or other wall-mounted fixtures within the pocket door frame cavity, offering a secure anchoring point.
Attaching the Track
Once the pocket door frame is securely in place, the track installation begins. Carefully position the track within the frame, ensuring it’s aligned correctly according to the manufacturer’s instructions. Johnson hardware offers pre-packaged sets with track lengths up to 96 inches for standard applications, while individual tracks extend to 192 inches for larger openings.
Secure the track to the header and side supports using screws appropriate for the material. Pay close attention to the track stops, which prevent the door from sliding out of the frame. Proper track installation is paramount for smooth, quiet operation; any misalignment will likely result in binding or sticking. Double-check all connections before proceeding to the next step.
Installing Door Guides
Door guides are crucial for maintaining the door’s vertical alignment and preventing wobble during operation. Johnson offers both visible and hidden guide options. Traditional compression-style plastic guides pinch the door’s edges, while Johnson’s hidden guides provide a cleaner aesthetic. For hidden guides, a slot must be routed into the bottom of the door, ensuring a precise fit.

Install the guides according to the manufacturer’s specifications, ensuring they are plumb and securely fastened to the floor. Proper guide installation prevents the door from swaying or coming off the track. Consider the floor finish allowance – typically 3/4 inch – when positioning the guides to accommodate flooring materials installed after installation. Accurate placement is key to a seamless and functional pocket door system.
Using Johnson Hidden Guides
Johnson hidden guides offer a refined look, eliminating visible hardware along the floor. However, their installation requires precise preparation. A slot must be carefully routed into the bottom edge of the door slab, perfectly aligning with the guide’s dimensions. This routing ensures the guide seamlessly integrates, providing stable vertical movement without pinching the door.
Accuracy is paramount during this step; an ill-fitting slot can lead to operational issues. Once the slot is complete, the hidden guide slides into place and is secured with screws. Ensure the guide is flush with the door’s bottom edge and firmly attached to the subfloor. This method provides a clean, modern aesthetic while maintaining the functionality of traditional door guides, enhancing the overall pocket door system.
Preparing the Door Slab
Before attaching the door to the hardware, meticulous preparation of the slab is crucial for smooth operation. Solid-core doors are highly recommended for their stability and soundproofing qualities, especially when utilizing heavy-duty frame kits. Carefully inspect the door for any warping or imperfections that could hinder its movement within the pocket.
If necessary, lightly sand the edges to ensure a consistent fit. The bottom of the door may require a precise cut to accommodate the chosen guide system – whether utilizing traditional compression guides or opting for Johnson’s hidden guide system, which necessitates a routed slot. Accurate measurements and clean cuts are essential to prevent binding or sticking. Finally, pre-drill pilot holes for the hardware attachment points to avoid splitting the wood.
Attaching the Door to the Hardware
With the door slab prepared, carefully align it with the installed pocket door frame and track. Begin by attaching the rollers to the top edge of the door, ensuring they are securely fastened and evenly spaced according to the Johnson hardware specifications. Lift the door and engage the rollers into the track, gently guiding it into the pocket opening.

Once the door is positioned, secure the mounting plate to the door’s leading edge. Confirm proper alignment and smooth rolling action before fully tightening all screws. Pay close attention to the door’s vertical alignment, as adjustments may be needed later. Finally, install any necessary door stops or guides to prevent over-travel and ensure a controlled closing motion;
Adjusting the Door for Smooth Operation
After attaching the door, meticulous adjustments are crucial for seamless functionality. Begin by testing the door’s full range of motion, identifying any points of friction or binding. Utilize the adjustable roller mechanisms to fine-tune the door’s height and alignment within the track. Small adjustments can significantly impact performance, so proceed incrementally;
Check for consistent contact between the door and the floor guides, ensuring smooth gliding without excessive pressure. If the door sticks or binds, re-evaluate the track alignment and roller settings. Consider lubricating the track and rollers with a silicone-based lubricant to minimize friction. A properly adjusted Johnson pocket door should move effortlessly and quietly.
Addressing Floor Clearance
Maintaining adequate floor clearance is paramount for preventing door binding and ensuring smooth operation; Johnson hardware is engineered with a built-in allowance for typical floor finishes, specifically a 3/4″ allowance above the subfloor. This foresight accommodates common flooring materials like tile or hardwood. However, if your floor finish deviates from this standard, adjustments are necessary.
Carefully assess the total height of your finished floor, including any underlayment or backer boards. If the finished floor exceeds the anticipated height, you may need to slightly raise the entire door assembly or trim the bottom of the door. Conversely, if the floor is lower, ensure the door doesn’t drag. Proper floor clearance guarantees effortless gliding and prevents premature wear on the door and hardware.
Accounting for Floor Finish (3/4″ Allowance)
Johnson hardware incorporates a crucial 3/4″ allowance to accommodate most standard floor finishes installed over the subfloor. This pre-calculated gap prevents the door from dragging or binding once flooring is laid. It’s essential to understand this allowance during installation, particularly when coordinating with other pre-hung doors in your home, which typically share the same gap specification.
If you’re installing flooring on top of a backer board, carefully consider the combined height. The 3/4″ allowance is designed for finish flooring alone. Adding a backer board increases the overall floor height, potentially requiring adjustments to the door’s hanging height or a slight trim of the door’s bottom edge. Accurate measurement and planning are key to avoiding operational issues post-installation.

Adding Reinforcement to the Frame
To maximize the stability and longevity of your Johnson pocket door installation, reinforcing the frame is highly recommended, especially with heavier solid-core doors. Johnson plywood clips are specifically designed for this purpose, allowing you to attach 5/8″ plywood to the metal studs forming the pocket frame. This creates a robust surface, significantly bolstering the wall cavity.
The added plywood not only strengthens the frame but also provides a solid backing for attaching items like toilet paper holders or other wall-mounted accessories. Using shorter screws ensures you secure these items without penetrating the door’s operating space. This technique transforms the pocket door frame into a functional wall section, offering increased versatility and durability beyond simply housing the door itself.
Using Johnson Plywood Clips
Johnson plywood clips are essential for adding substantial reinforcement to the metal studs of your pocket door frame. These clips are designed to securely fasten 5/8″ plywood directly to the studs, creating a solid and stable backing within the wall cavity. Installation is straightforward: simply position the clip against the stud and plywood, then fasten with appropriate screws.
Spacing the clips strategically along the length of the studs ensures even distribution of support. This reinforcement is particularly crucial when using heavier solid-core doors, preventing flexing or potential damage to the frame over time. The plywood also provides an excellent surface for mounting accessories, offering a secure anchor point for items like towel racks or toilet paper holders, utilizing shorter screws to avoid interference with the door’s operation.
Soft-Close Mechanism Installation
Johnson offers 1500SC soft-close pocket door frames, designed to eliminate slamming and provide a quiet, controlled closing experience. Installation typically involves integrating the soft-close mechanism directly into the pocket door frame during the initial setup phase. The system utilizes a damper that gradually slows the door’s movement as it approaches the closed position.
Carefully follow the manufacturer’s instructions, as specific installation steps may vary depending on the model. Generally, this involves attaching the soft-close components to the track or door itself, ensuring proper alignment and functionality. Testing the mechanism after installation is crucial to confirm smooth and reliable operation. A properly installed soft-close system significantly enhances the usability and convenience of your pocket door, reducing noise and preventing potential damage.

Troubleshooting Common Issues
One frequent problem is door binding or sticking, often caused by improper installation or misalignment. Inspect the track for obstructions and ensure the door guides are functioning correctly. Verify the frame is square and plumb, as any deviation can lead to friction. Check for adequate floor clearance, remembering the allowance for floor finishes – typically 3/4 inch.
If the door doesn’t close fully, adjust the track stops or door stops. For soft-close mechanisms, ensure they are properly engaged and haven’t become dislodged. Loose screws or a weakened frame can also contribute to issues; reinforce the frame with plywood clips if necessary. Addressing these common problems promptly will maintain smooth operation and prevent further damage, extending the life of your Johnson pocket door system.
Door Binding or Sticking
When a Johnson pocket door binds or sticks, the first step is a thorough inspection of the track. Look for any debris or obstructions that might impede the rollers’ movement. Ensure the door guides, particularly hidden guides, are correctly positioned and haven’t shifted. Verify the door slab isn’t rubbing against the frame, checking for squareness and plumb.
Often, binding results from insufficient floor clearance, especially after flooring installation. Remember the recommended 3/4″ allowance for floor finishes. If the frame is weak, it can flex, causing misalignment; reinforcing with plywood clips can resolve this. Finally, confirm the rollers are functioning smoothly and consider lubricating them if necessary, addressing the root cause for seamless operation.
Johnson Hardware Replacement Parts
Maintaining a Johnson pocket door system often requires replacing worn or damaged components. Fortunately, Johnson Hardware offers a comprehensive range of replacement parts, including rollers, track stops, door stops, and guides. Universal replacement parts are readily available for various series, simplifying repairs. Specific to the 1500 series, you can find replacements for soft-close mechanisms and frame components.
Locating the correct part is crucial; identifying the door series and specific component is essential. Johnsonhardware.com provides detailed parts lists and diagrams. Additionally, retailers specializing in door hardware stock common replacements. Consider keeping a small inventory of frequently used parts, like rollers and guides, to address minor issues promptly and avoid prolonged disruptions.
Finding Installation Instructions
Accessing clear and accurate installation instructions is paramount for a successful Johnson pocket door installation. Johnson Hardware provides a wealth of resources, including detailed guides for each product series. Buildipedia is a particularly valuable resource, offering step-by-step instructions specifically for Johnson pocket door frames, detailing procedures like unscrewing split heads and side wall preparations.
The Johnsonhardware.com website hosts downloadable PDFs covering various configurations for sliding, folding, and pocket door hardware. These instructions often include diagrams and illustrations to aid understanding. Furthermore, online forums like DIY Home Improvement Forum can provide supplemental advice and clarify specific installation challenges. Always refer to the instructions included with your specific hardware kit for the most accurate guidance.
Buildipedia Resources
Buildipedia stands out as a comprehensive online resource for Johnson pocket door installation instructions, offering detailed guides specifically tailored to Johnson Hardware products. These resources go beyond basic assembly, providing in-depth explanations of each step, from preparing the wall opening to final adjustments. Notably, Buildipedia’s instructions for the Johnson 1500 series pocket door frame are particularly helpful.
The platform’s guides often include visual aids, such as diagrams and photographs, to clarify complex procedures like securing the header and attaching the track. Buildipedia also addresses common installation nuances, like accounting for floor finishes and reinforcing the frame. Accessing these resources can significantly streamline the installation process and minimize potential errors, ensuring a professional and durable result. It is a go-to source for both DIY enthusiasts and professional installers.

Best Practices for Durability
To maximize the lifespan and performance of your Johnson pocket door, employing best practices during installation is crucial. Opting for heavy-duty frame kits, specifically those rated for 200lb, provides a robust foundation capable of handling substantial use and heavier door slabs. Pairing these kits with solid-core doors further enhances stability and reduces the risk of warping or damage over time.
Reinforcing the wall cavity is also paramount; utilizing Johnson plywood clips to add 5/8 plywood between the metal studs significantly strengthens the structure. This allows for secure attachment of accessories and prevents the frame from flexing. Furthermore, choosing ball-bearing rollers over standard wheels ensures smoother, quieter operation and reduces wear and tear. These proactive measures contribute to a long-lasting, reliable pocket door system.
Heavy-Duty Frame Kits (200lb Rating)
Selecting a heavy-duty Johnson frame kit, rated for a 200lb capacity, is a foundational step towards a durable and reliable pocket door installation. These kits are engineered to withstand frequent use and support the weight of solid-core doors, minimizing stress on the hardware and frame components. Compared to standard-duty options, they offer significantly increased structural integrity, preventing sagging or misalignment over time.
The enhanced construction of these kits typically includes thicker gauge metal and reinforced connection points. Investing in a 200lb rated kit is particularly advisable for high-traffic areas or when using heavier door materials. This proactive approach safeguards against premature wear and tear, ensuring smooth operation and extending the overall lifespan of your pocket door system. Consider this a vital upgrade for long-term performance and peace of mind.
Solid-Core Door Recommendations
When pairing Johnson pocket door hardware with a door slab, opting for a solid-core construction is highly recommended for optimal performance and longevity. Unlike hollow-core doors, solid-core doors provide substantial weight and rigidity, which are crucial for smooth gliding and reduced noise. They minimize vibrations and prevent the door from feeling flimsy during operation, enhancing the overall user experience.
Solid-core doors also contribute to improved sound insulation, offering greater privacy and a quieter environment. Furthermore, their increased density provides better resistance to warping or damage, ensuring a more durable and aesthetically pleasing result. When combined with heavy-duty frame kits and ball-bearing rollers, a solid-core door creates a robust and reliable pocket door system built to withstand daily use for years to come.